Tuesday, September 8, 2015

To Change the Logo of Demo site

To change any image we need to replace the existing image with the new ones in this folder
1. Save the desired image(Logo.gif) in the folder C:/Program files/Common files/Microsoft Shared/Web Server Extensions/15/Template/Images

(Or)
We can upload to SharePoint Site Assets Library and then now image can be set as site logo
2. Open Top Level Site à Settings [Gear Symbol on Top Right of the page] àSite Settings à[under Look and Feel] Title Description and IconàInsert Logo from computer (or) From SharePoint (or) from SharePoint Relative address àAlt Description: Demo Logo àOK.


Monday, February 10, 2014

Event Receiver in SharePoint 2010

Microsoft Visual Studio 2010 provides a project type that enables you to build event receivers that perform actions before or after selected events on a Microsoft SharePoint 2010 site. We can create Event Receivers (Event Handlers) to take care of things for us when specific things happen. For example, we can subscribe to the "ItemAdded" event for a specific list, and have our custom code execute when the event fires.
The event receiver will change the Title of the item to current year Time once it’s added to the list. We will create and deploy the solution as a farm and will run in debug mode.


·         Open Visual Studio 2010 and create a new Project.
·         In project types select Event Receiver and give it a name.
·         Select .net framework 3.5.
Next in the SharePoint Customization Wizard, choose deploy as a farm solution and specify the site URL where you want the event handler to be deployed as shown in the below figure:

Next, in Event Receiver Settings dialog select the “List Item Events” as a type of event receiver and “Custom List” in the Item source dropdown. Select “An Item was Added” from Handle the following events as shown below:
Next, we will write some code to change the Title of an item to the current year when it is added to a custom list.
using System;
using System.Security.Permissions;
using Microsoft.SharePoint;
using Microsoft.SharePoint.Security;
using Microsoft.SharePoint.Utilities;
using Microsoft.SharePoint.Workflow;

namespace EventHandlinginSP.EventReceiver1
{
    public class EventReceiver1 : SPItemEventReceiver
    {
        public override void ItemAdded(SPItemEventProperties properties)
        {
            base.ItemAdded(properties);
            SPListItem _currentItem = properties.ListItem;
            _currentItem["Title"] = DateTime.Now.Year;
            _currentItem.Update();
        }
    }
}
To build and deploy an application press “F5″.
Once press F5 the solution gets deployed to your site and your Visual studio project goes into a debug mode. Now we will create a new custom List “My List” and add a new item to test our handler.
Create A Custom  List and add new item , will give you the result!


Thursday, February 6, 2014

SharePoint 2010 Web Parts and Their Features

SharePoint 2010 Web Parts and Their Features


SharePoint 2010 Web Parts and Their Features
  
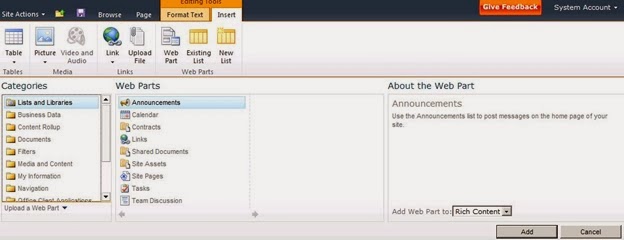
Below is a list of all of the “out of the box” web parts that comes with SharePoint 2010.   Some web parts will require additional farm solutions like SQL Reporting.
Business Data
Business Data Actions - Displays a list of actions from Business Data Connectivity.
Business Data Connectivity Filter - Filters the contents of Web Parts using a list of values from the Business Data Connectivity.
Business Data Item - Displays one item from a data source in Business Data Connectivity.
Business Data Item Builder - Creates a Business Data item from parameters in the query string and provides it to other Web Parts.
Business Data List - Displays a list of items from a data source in Business Data Connectivity.
Business Data Related List - Displays a list of items related to one or more parent items from a data source in Business Data Connectivity.
Chart Web Part - Helps you to visualize your data using charts, pull data from another web part, SharePoint lists, Business Data Catalog, or Excel Services.
Excel Web Access - Use the Excel Web Access Web Part to interact with an Excel workbook as a Web page.
Indicator Details - Displays the details of a single Status Indicator. Status Indicators display an important measure for an organization and may be obtained from other data sources including SharePoint lists, Excel workbooks, and SQL Server 2005 Analysis Services KPIs.
Status Lists - Shows a list of Status Indicators. Status Indicators display important measures for your organization, and show how your organization is performing with respect to your goals.
Visio Web Access - Enables viewing and refreshing of Visio Web Drawings, like org charts, workflows, business processes and more.
________________________________________
Content Rollup
Categories - Displays categories from the Site Directory, discontinued in SharePoint 2010, available for SharePoint 2007 upgrades.
Content Query - Rolls up data from sub sites throughout your site. Data can be queried and filtered based on content type, site columns, and specific lists and libraries.
Relevant Documents - Displays documents that have been modified by, created by, or checked out to the current user, within the current web site (not the entire site collection).
RSS Viewer - Displays an RSS feed from other websites or services.
Site Aggregator - Displays specific information from the sites of your choice, defaults to showing documents similar to Relevant Documents.
Sites In Category - Displays sites from the Site Directory within a specific category, discontinued in SharePoint 2010, available for SharePoint 2007 upgrades.
Summary Links - Allows authors to create a custom link library that can be grouped and styled.
Table Of Contents - Displays the navigation hierarchy of your site, subsites, lists and libraries.
Web Analytics Web Part - Displays the most viewed content, most frequent search queries from a site, or most frequent search queries from a search center.
WSRP Viewer - Displays portlets from web sites using WSRP 1.1.
XML Viewer - Transforms XML data using XSL and shows the results.
________________________________________
Filters
Apply Filters Button - Add this button to a page so users can decide when to apply their filter choices. Otherwise, each filter is applied when its value is changed.
Choice Filter - Filters the contents of Web Parts using a list of values entered by the page author
Current User Filter - Filters the contents of Web Parts by using properties of the current user
SharePoint 2010 Web Parts and Their Features
Date Filter - Filter the contents of Web Parts by allowing users to enter or pick a date
Page Field Filter - Filters the contents of Web Parts using information about the current page
Query String (URL) Filter - Filters the contents of Web Parts using values passed via the query string
SharePoint List Filter - Filters the contents of Web Parts by using a list of values
SQL Server Analysis Services Filter - Filters the contents of Web Parts using a list of values from SQL Server Analysis Services cubes
Text Filter - Filters the contents of Web Parts by allowing users to enter a text value
________________________________________
Forms
HTML Form Web Part - Connects simple form controls to other Web Parts
InfoPath Form Web Part - Use this Web Part to display an InfoPath browser-enabled form
________________________________________
Media and Content
Content Editor - Allows authors to enter rich media content like formatted text, images, and other custom HTML.
Image Viewer - Displays a specified image.
Media Web Part - Use to embed media clips (video and audio) in a web page, links directly to a video file, not a video service like YouTube.com.
Page Viewer - Displays another Web page on this Web page inside of a window.
Picture Library Slideshow Web Part - Use to display a slideshow of images and photos from a picture library
Silverlight Web Part - A web part to display a Silverlight application
________________________________________
Outlook Web App
My Calendar - Displays your calendar using Outlook Web Access for Microsoft Exchange Server 2003 or later
My Contacts - Displays your contacts using Outlook Web Access for Microsoft Exchange Server 2003 or later
My Inbox - Displays your inbox using Outlook Web Access for Microsoft Exchange Server 2003 or later
My Mail Folder - Displays your mail folder using Outlook Web Access for Microsoft Exchange Server 2000
My Tasks - Displays your tasks using Outlook Web Access for Microsoft Exchange Server 2003 or later   
Social Collaboration
Contact Details - Displays details and image for a single contact.
Note Board - Enable users to leave short, publicly-viewable notes about this page.
Organization Browser - This Web Part displays each person in the reporting chain in an interactive view optimized for browsing organization charts. Additional information has to be managed in Active Directory.
Site Users - Use the Site Users Web Part to see a list of users and groups who have access to the current site, or list users from a selected group.  
Tag Cloud - Displays the most popular subjects being tagged inside your organization  
User Tasks - Displays tasks that are assigned to the current user within the site, does not include all tasks in site collection.  
________________________________________
SQL Server Reporting
SQL Server Reporting Services Report Viewer - Use the Report Viewer to view SQL Server Reporting Services reports.  

- Filter the contents of Web Parts by allowing users to enter or pick a date
Page Field Filter - Filters the contents of Web Parts using information about the current page
Query String (URL) Filter - Filters the contents of Web Parts using values passed via the query string
SharePoint List Filter - Filters the contents of Web Parts by using a list of values
SQL Server Analysis Services Filter - Filters the contents of Web Parts using a list of values from SQL Server Analysis Services cubes
Text Filter - Filters the contents of Web Parts by allowing users to enter a text value
________________________________________
Forms
HTML Form Web Part - Connects simple form controls to other Web Parts
InfoPath Form Web Part - Use this Web Part to display an InfoPath browser-enabled form
________________________________________
Media and Content
Content Editor - Allows authors to enter rich media content like formatted text, images, and other custom HTML.
Image Viewer - Displays a specified image.
Media Web Part - Use to embed media clips (video and audio) in a web page, links directly to a video file, not a video service like YouTube.com.
Page Viewer - Displays another Web page on this Web page inside of a window.
Picture Library Slideshow Web Part - Use to display a slideshow of images and photos from a picture library
Silverlight Web Part - A web part to display a Silverlight application
________________________________________
Outlook Web App
My Calendar - Displays your calendar using Outlook Web Access for Microsoft Exchange Server 2003 or later
My Contacts - Displays your contacts using Outlook Web Access for Microsoft Exchange Server 2003 or later
My Inbox - Displays your inbox using Outlook Web Access for Microsoft Exchange Server 2003 or later
My Mail Folder - Displays your mail folder using Outlook Web Access for Microsoft Exchange Server 2000
My Tasks - Displays your tasks using Outlook Web Access for Microsoft Exchange Server 2003 or later                                                      
________________________________________
PerformancePoint
PerformancePoint Filter - This web part displays PerformancePoint filters. Filters may be linked to other web parts to provide an interactive dashboard experience. Filter types include lists and trees based on a variety of data sources
PerformancePoint Report - This web part displays PerformancePoint reports. Reports may be linked to other web parts to create an interactive dashboard experience. Report types include: Analytic charts & grids, Strategy Maps, Excel Services, Reporting Services, Predictive Trend charts, and web pages
PerformancePoint Scorecard - This web part displays a PerformancePoint scorecard. Scorecards may be linked to other web parts, such as filters and reports, to create an interactive dashboard experience.
PerformancePoint Stack Selector - This web part displays a PerformancePoint Stack Selector. All PerformancePoint web parts, such as filters and reports, contained in the same zone will be automatically stacked and selectable using this web part.
________________________________________
Search
Advanced Search Box - Displays parameterized search options based on properties and combinations of words.
Dual Chinese Search - Used to search Dual Chinese document and items at the same time.
Federated Results - Displays search results from a configured location
People Refinement Panel - This webpart helps the users to refine people search results
People Search Box - Presents a search box that allows users to search for people
People Search Core Results - Displays the people search results and the properties associated with them.
Refinement Panel - This webpart helps the users to refine search results
Related Queries - This webpart displays related queries to a user query
Search Action Link - Displays the search action links on the search results page
Search Best Bets - Displays high-confidence results on a search results page.
Search Box - Displays a search box that allows users to search for information.
Search Core Results - Displays the search results and the properties associated with them
Search Paging - Display links for navigating pages containing search results.
Search Statistics - Displays the search statistics such as the number of results shown on the current page, total number of results and time taken to perform the search.
Search Summary - Displays suggestions for current search query
Search Visual Best Bet - Displays Visual Best Bet
Top Federated Results - Displays the Top Federated result from the configured location
________________________________________
SQL Server Reporting
SQL Server Reporting Services Report Viewer - Use the Report Viewer to view SQL Server Reporting Services reports.  


Wednesday, February 5, 2014

Visual Web Part in sharepoint 2010

 Visual Web Part Project Creation
In this task, you create a Visual Web Part project in Microsoft Visual Studio 2010.

1. Start Visual Studio 2010, click File, point to New, and then click Project.
2. Navigate to the Visual C# node in the Installed Templates section, click SharePoint, and then click 2010.
3. Select the Visual Web Part project template, provide a name, a location for your project, and then click OK.


Figure 1. Select Visual Web Part project type

  1. In the What local site do you want to use for debugging dropdown, select the site to use (such as http://localhost/sites/SampleWebSite). Also select the Deploy as a farm solution option and then click  Finish.
After the project is created, Solution Explorer contains the default Visual Web Part named VisualWebPart1 (see Figure 2). Also see in Solution Explorer the presence of the Features and Package nodes. A feature organizes your application in a way that SharePoint Foundation understands. Features can be deployed to SharePoint Foundation at the site or Web level. The package contains features and other assets used when you deploy solutions to SharePoint Foundation.
[note: better remove the default visual webpart and a new visual wbpart with a good name, otherwise all your visual webpart have the same name ,that is VisualWebPart1 ]

Figure 2. The SampleWebPart project in the Solution Explorer 

Add the following code:


Button btn =null;
Label lb=null;
protected override void  CreateChildControls (....)
{
lb=new Label();
 btn=new Button{ text="Hello"};
btnClick+=new EventHandler(btn_Click);

this.controls.add(lb);
this.controls.add(btn);

}
void btn_Click()
{
lb.Text="We are fine";
}
/* usually we get a flow layout , we dont 've any control over the position of controls.for that we use RenderContents method   */

 Protected override  void RenderContents(..)
{
writer .RenderBeginTag(HtmlTextWriterTag.Table);
writer .RenderBeginTag(HtmlTextWriterTag.Tr);
writer .RenderBeginTag(HtmlTextWriterTag.Td);
lb.RenderControl(writer);
writer.RenderEndTag();
writer .RenderBeginTag(HtmlTextWriterTag.Td);
btn.RenderControl(writer);
writer.RenderEndTag();

}


Build and Deploy the Web Part

In this task, you build and deploy the Web Part project.
Build and deploy the project by using one of the following options:
When debugging the SharePoint solution, use the F5 key to build and deploy your solution. By doing this, the debug experience includes steps such as help for creating a Web Part Page and resetting Internet Information Services (IIS).
Alternately, you can build and deploy your solution by clicking the Build menu, selecting Build Solution, verifying that the solution builds without any errors, and then selecting Deploy Solution.

Create a Webpart Page
In this task, you create a Web Parts page to contain the Web Part, unless one has already been created for you.

Here is a sample webpart page

  1. If you clicked F5 to debug your application, by default, the page where you create a Web part page is displayed. Otherwise, open the SharePoint site, click Site Actions, click View All Site Content, click Create, scroll and select the Web Part Page option.
  2. In the Web Part Page screen, provide the information requested about that particular Web Parts page. For example, provide a name (SampleWebPartPage) and layout template for the page.
  3. In the Document Library dropdown, select Site Pages, and then click Create. SharePoint creates and displays your Web Parts page.

Add the Web Part to the Web Parts Page
In this task, you add the Web Part to the Web Parts page and test the solution.
On the Web Parts page, click into the Add a Web Part text in the zone where you want the Web Part displayed.
In the Categories list, click Custom. In the Web Parts box, click your visual webpart name.
In the About the Web Part box at the top of the page, click Add. The Web Part is added to the zone that you selected as shown in Figure 4. Note that the lists and SubWebs are displayed in a hierarchical view.


Creating a Basic Web Part in sharepoint 2010

Creating a Basic Web Part
1. Start Microsoft Visual Studio 2010.
2. On the File menu, point to New, and then click Project. 
3. In the New Project dialog box, in the Installed Templates pane, expand the SharePoint node under the programming language that you want to use, and then select 2010.
4. In the Templates pane, select Empty SharePoint Project.
5. Type FirstWebpart as the project name, and then click OK.
6. In the SharePoint Customization Wizard, select Deploy as a sandboxed solution, and then click Finish.
7. In Solution Explorer, click the FirstWebpart  project.
8. On the Project menu, click Add New Item.
9. In the Add New Item dialog box, select the Web Part template, type DisplayMessageWebPart as the Name, and then click Add.
To create the Web Part property
1. In the DisplayMessageWebPart file, copy and paste the following code to create a basic customizable property.
private string customMessage = "Hello, world!";

public string DisplayMessage
{
    get { return customMessage; }
    set { customMessage = value; }
}
2. Add the following tags above the public declaration to allow changes on a per-user basis.
[WebBrowsable(true),
  WebDescription("Displays a custom message"),
  WebDisplayName("Display Message"),
  Personalizable(PersonalizationScope.User)]
Now you have created a personalizable Web Part property.
The WebBrowsableAttribute attribute ensures that your custom property renders in the editing tool pane in SharePoint Foundation.
The WebDescriptionAttribute attribute displays a tooltip to help guide users when they are editing your custom property.
The WebDisplayNameAttribute attribute shows a display name for your custom property.
The PersonalizableAttribute attribute determines whether changes to your custom property affect all users or only individual users.

Overriding the CreateChildControls Method
By overriding the CreateChildControls method, you can tell the Web Part what operations to perform when the page is visited. In this example, the Web Part renders the user-defined text.
To override the CreateChildControls method
protected override void CreateChildControls()
{
    base.CreateChildControls();
    LiteralControl message = new LiteralControl();
    message.Text = DisplayMessage;
    Controls.Add(message);
}
Deploying and Testing the Web Part
 Press F5 to deploy the Web Part.
1. Click Site Actions, and then click More Options.
2. On the Create page, click Web Part Page, and then click Create.
3. On the New Web Part Page page, for the Name, type DisplayMessageWebPartPage, and then click Create.
4. Click Add a Web Part in the Header zone.
5. On the ribbon, click the Insert tab, and then click Web Part.
6. In the Categories pane, click Custom.
7. In the Web Parts pane, click DisplayMessageWebPart, and then click Add.
8. On the ribbon, click the Page tab, and then click Stop Editing

Monday, November 18, 2013

Client Object Model

Client Object Model is a  feature of SharePoint 2010. It provides programming in a SharePoint site using .Net Managed Code or JavaScript.

The Client Object Model provides almost all the programming features of the Server Object Model plus advantages on deployment. The Client OM (Client Object Model) is being used as the core programming aid for SharePoint 2010 and thus widely used in the market.

Advantages

  1. Less Deployment Hassles: Using the Client OM, you do not need to install the components required by Server Object Model. Thus the Client OM provides significant conveniences for the end user.
  2. Language Flexibility: We can use the following languages to work with the Client OM:

    a. Microsoft .Net
    b. Silverlight
    c. ECMA Script (JavaScript / Jscript)
     
  3. Query Speed Optimizations: In the Client OM, reduced network traffic is attained using Query Optimizations. Thus the user will feel reduced round trips and other advantages like paged results etc.
  4. everywhere using COM we can access the SharePoint data from the client side browser itself with Silverlight and ECMAScript applications.
  5. Web parts with very rich user interface can be developed with the help of Silverlight and jQuery. For example, we can create web parts like video and image galleries with beautiful animations where the videos and the images can be stored in the SharePoint libraries and retrieved using COM.
  6. COM along with JavaScript or jQuery can be implemented with just a Content Editor Web part within the browser or from the SharePoint designer without opening the Visual Studio. You can read about it here on how to do that.
  7. When we save your site as a template. The application developed with ECMAScript or Silverlight application implemented with Client Object Model would come along with the template which would be very helpful during migrations though we need to take care of any hard coded values.
  8. No IISREST is required while deploying a Silverlight or an ECMAScript application implemented with COM.
  9. We can have SharePoint accessed from the client desktop using Windows forms or WPF applications implemented with COM. We can develop desktop gadget kind of applications which would be displaying the new announcements added to the “Announcements” list.
  10. No SharePoint installation is required in the development machine. Only the dll’s are required if you are going to develop Silverlight applications.
Disadvantages

1.      We cannot elevate the privilege or Impersonate in COM as in Server Object Model. That is, we cannot use the RunWithElevatedPrivilege kind of a delegate. Therefore, the results retrieved using COM will always be security trimmed by default.
2.      The range of classes available to access SharePoint data is very limited in COM. For example, we do not have Classes for accessing User Profiles. We need to go for SharePoint web services.
3.      We cannot access the objects of another site collection in COM while implementing in Silverlight or in ECMAScript. We will get “The security validation for this page is invalid.” if we try to do so. So, we cannot develop applications to read the data from another site collection.
4.      Silverlight web parts fail to load by giving an error message saying “Could not download the Silverlight application or the Silverlight Plugin did not load. To re-configure the Web Part or to provide a different Silverlight application (.xap), open the tool pane and then click Configure.” when it takes more than 5 seconds to load.
5.      We cannot retrieve recurring events from a SharePoint calendar list in Client Object Model.

    Friday, November 15, 2013

    Client Object Model vs Server Object Model in SharePoint 2010

    Client Object Model vs Server Object Model in SharePoint 2010 ?

    Server Object Model
    Client Object Model
    Server Object Model is like a Production Server Environment to access the data where shapoint server installed on the machine .
    Client Object Model  can access the data from the system where sharepoint server is not  installed on the machine via Web Services , API , JavaScript etc 
    Most extensive set of options to customize SharePoint 2010. Any Components consuming server-side object model needs to be deployed on the server
    Client OM APIs are wrappers around a custom Web service that calls the server-side object model.
    Slower Performance than Client OM and REST API(s)
    Better Performance than server-side OM
    Synchronous
    Asynchronous
    Server Object Model  is slower than client object model.  But to access Farm object we can use Server object model only
    Client object model gives result in fast manner, but there is a limitation. The limitation is, we can not access Farm Object using Client object model.